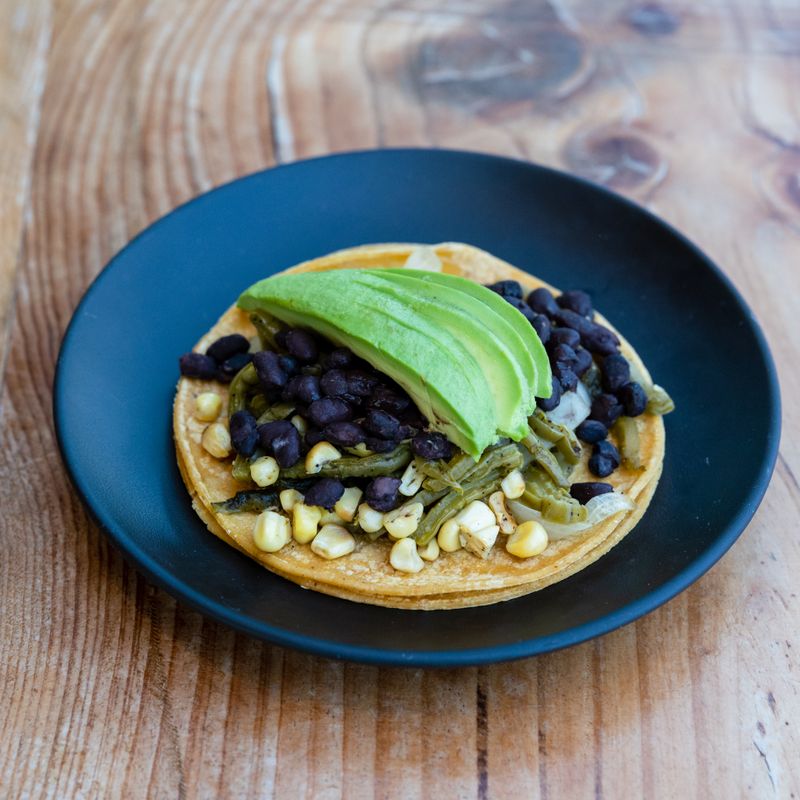
Corn Arepas with Black Beans
Crispy-edged, tender corn arepas filled with seasoned black beans and cheese. These Venezuelan-style corn cakes are pan-fried until golden, with a soft interior and satisfying crunch. Serve warm with avocado, crema, or salsa.
- Prep
- 20 min
- Cook
- 25 min
- Wait
- 10 min
- Total
- 55 min
- Makes
- 8 arepas (2 per serving)
Steps
Before you start
- Have all ingredients measured and ready
- If using canned black beans, drain and rinse them well
- Allow the arepa dough to rest for 10 minutes before shaping so it holds together better
- Preheat a large skillet or griddle over medium-high heat
Warm the water and mix dough
- In a large mixing bowl, combine the masa harina and salt.
- Gradually add the 1¾ cups warm water while stirring with a wooden spoon until the dough comes together.
- It should feel like moist playdough—soft but not wet, and it should hold together without being sticky.
- If it's too dry, add 1 tablespoon more water at a time.
- Let the dough rest for 10 minutes, covered loosely with a damp kitchen towel.
- This resting time allows the flour to fully hydrate and makes shaping much easier.
+ Show details− Hide details
Ready when: Dough is soft, moist, and holds together
Tip: Don't skip the resting time—it makes a huge difference in how easily you can shape the arepas without them cracking.
Prepare the black bean filling
- While the dough rests, warm a medium saucepan over medium heat.
- Add 1 tablespoon of the soft butter and let it melt.
- Add the minced garlic and cook for about 30 seconds, stirring constantly, until fragrant.
- Add the drained black beans, cumin, and black pepper.
- Stir well to coat the beans.
- Cook for 3–4 minutes, stirring occasionally, until the beans are warm and infused with the spices.
- Mash about one-third of the beans with the back of the spoon to create a slightly thick, chunky mixture that holds together when pressed.
- The beans should be warm enough to hold their shape when spooned into the arepas.
- Transfer to a small bowl and set aside.
+ Show details− Hide details
Ready when: Beans are warm, fragrant, and partially mashed into a thick mixture
Tip: Mashing some of the beans creates a filling that stays inside the arepa instead of falling out when you bite into it.
Shape the arepas
- Once the dough has rested, have a small bowl of water nearby for your hands.
- Using slightly damp hands (to prevent sticking), take about 3 tablespoons of dough and form it into a ball.
- Flatten it gently into a thick disc about 3 inches wide and ½ inch thick in your palm.
- Make a small indent in the center with your thumb, pushing partway through.
- Place about 1 tablespoon of the warm black bean mixture into the indent, then place one cheese cube on top of the beans.
- Fold the dough slightly over the filling and gently press the seams closed, re-forming it into a thick disc.
- The arepa should be about 3 inches in diameter and ¾ inch thick.
- Repeat with the remaining dough to make 8 arepas total.
- Arrange them on a lightly oiled plate as you finish shaping.
+ Show details− Hide details
Ready when: Eight arepas are shaped, sealed, and evenly sized
Tip: Keep your hands damp but not dripping—this prevents the dough from sticking. If an arepa cracks, just pinch it closed and reshape it.
Heat the skillet and oilOven 350°F / 175°C
- Heat a large skillet (12-inch) or griddle over medium-high heat for 2 minutes.
- Carefully add the ½ cup vegetable oil and let it heat for another 1–2 minutes.
- The oil should shimmer and a small piece of dough dropped into it should sizzle immediately.
- You're aiming for an oil temperature of around 350°F (175°C), though a kitchen thermometer is not essential—the visual and auditory cues of sizzling are reliable indicators.
+ Show details− Hide details
Ready when: Oil shimmers and sizzles when a small piece of dough is dropped into it
Tip: Don't skip preheating the oil—if it's too cool, the arepas will absorb oil and become greasy instead of crispy.
Pan-fry the arepas in batches
- Carefully place 4 arepas into the hot oil, spacing them so they don't touch.
- They should sizzle immediately.
- Fry for 4–5 minutes on the first side without moving them, until the bottom is deep golden brown and crispy.
- Use tongs to gently flip each arepa and fry the second side for another 4–5 minutes until also deep golden brown.
- The arepas should sound hollow when tapped with a spoon, and a toothpick inserted into the center should meet no resistance from raw dough.
- Transfer the cooked arepas to a plate lined with paper towels to drain.
- Repeat with the remaining 4 arepas, letting the oil return to temperature for about 1 minute between batches.
+ Show details− Hide details
Ready when: Arepas are deep golden brown on both sides, sound hollow when tapped, and are firm to the touch
Tip: Don't flip the arepas too early or move them around in the pan—they need time to develop a crispy crust. If the crust is browning too fast before the inside cooks, reduce the heat slightly to medium.
Rest and serve
- Let the finished arepas rest on the paper towel-lined plate for 2 minutes so they finish draining and cool just enough to handle.
- Serve them warm, with your choice of toppings: sliced avocado, Mexican crema or sour cream, fresh cilantro, diced tomato, or salsa.
+ Show details− Hide details
Ready when: Arepas are still warm and crispy
Good to know
Tips
- For extra flavor, add ½ teaspoon of smoked paprika or a pinch of cayenne pepper to the black bean filling.
- If your arepas are splitting open during frying, the dough may be too dry. When making the next batch, add an extra tablespoon or two of water to the dough.
- Arepas are best eaten within a few hours of frying while they still have a crispy exterior. If they sit for too long, the exterior softens—reheating restores the crispness.
- For a vegetarian protein boost, add a handful of diced queso fresco or a spoonful of shredded cooked chicken to the bean filling before stuffing the arepas.
Make ahead
You can prepare the black bean filling up to 2 days ahead and refrigerate it. You can also shape the arepas up to 4 hours ahead, cover them with plastic wrap, and refrigerate them. Fry them just before serving for the crispiest crust. The dough itself is best used within 1 hour of mixing.
Storage & reheating
Store cooled arepas in an airtight container at room temperature for up to 2 days or in the freezer for up to 3 months. To reheat, place them on a baking sheet and warm in a 350°F (175°C) oven for 8–10 minutes (add 2 minutes if frozen), until they're warmed through and the exterior crisps slightly. You can also reheat them briefly in a dry skillet over medium heat for 2–3 minutes per side.
Substitutions
- queso de mano or mozzarella cheese, cut into 8 cubes → queso blanco, oaxaca, or fresh mozzarella. Use any mild, semi-soft cheese that holds its shape when heated. Avoid hard cheeses like cheddar as they can leak out during frying.
- canned black beans → pinto beans or refried beans. If using refried beans, use them straight from the can—no additional cooking needed. If using whole pinto beans, mash them and season the same way.
- masa harina (corn flour for arepas) → polenta or cornmeal (not cornstarch). Use finely ground polenta or instant cornmeal in the same quantities. The texture will be slightly grainier but still delicious.
- vegetable oil or canola oil → coconut oil or peanut oil. Both have high smoke points suitable for pan-frying. Coconut oil will add a subtle tropical note.
More tacos & burritos
See all →


Find more like this
- Meal
- Lunch
- Cuisine
- Mexican
- Main ingredient
- MozzarellaBlack Beans
- Method
- Stovetop