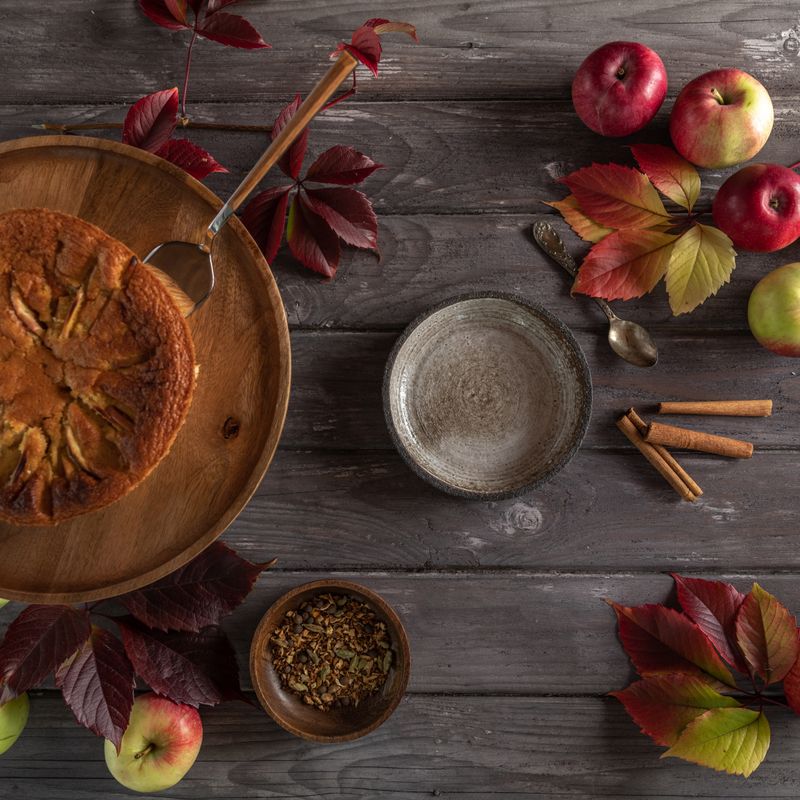
Chinese Five-Spice Apple Pie
This aromatic apple pie blends the familiar comfort of a classic dessert with warming spices inspired by Chinese five-spice powder—a fragrant blend of cinnamon, clove, star anise, and Sichuan pepper. Tart and sweet apples are mounded into a buttery crust, topped with a shimmering golden lid, and baked until the filling bubbles at the edges and your kitchen fills with an intoxicating aroma. Serve at room temperature with vanilla ice cream or whipped cream for a dessert that feels both cozy and exotic.
- Prep
- 24 min
- Cook
- 52 min
- Wait
- 3 hr 25 min
- Total
- 4 hr 41 min
- Makes
- 1 pie (8 slices)
Steps
Before you start
- Read the entire recipe to understand the timing—cooling takes 2–3 hours before you can slice.
- Have your pie dough ready: either store-bought frozen dough (thawed according to package directions) or homemade dough chilled for at least 1 hour.
- Gather all ingredients and measure them before you begin, so you're not fumbling while the apples are sliced and oxidizing.
- Use a mix of tart Granny Smith and sweet Honeycrisp (or Gala) apples for balanced flavor and texture.
- Set up a wire cooling rack on the counter before you start baking—you'll need it immediately when the pie comes out of the oven.
Peel and slice apples
- Wash the Granny Smith and Honeycrisp apples thoroughly.
- Using a vegetable peeler or paring knife, remove the skin from each apple.
- Cut each apple in half and remove the core with a melon baller or small knife.
- Slice the apple halves into thin, even slices about 1/4 inch (6 mm) thick—aim for consistent sizes so they cook evenly.
- Place all the slices in a large bowl and toss them with the fresh lemon juice, turning gently with your hands or a spatula until every slice is coated.
- The lemon juice prevents browning and adds brightness to the filling.
+ Show details− Hide details
Ready when: Apples are uniformly sliced and all coated with lemon juice
Tip: Use a mix of tart and sweet apples for balanced flavor—all one variety produces a flat, one-dimensional taste.
Mix the filling
- In a small bowl, whisk together the brown sugar, granulated white sugar, Chinese five-spice powder, cornstarch, and kosher salt.
- Whisk until thoroughly combined and there are no lumps of cornstarch or clumps of sugar—this ensures even seasoning and smooth thickening.
- Pour this dry mixture over the apple slices in the large bowl.
- Add the vanilla extract and scatter the cold butter pieces over the top.
- Using a silicone spatula or large spoon, gently fold and turn the mixture together, being careful not to break apart the apple slices.
- You're aiming for all the apples to be evenly coated with the sugar-spice mixture, which will draw out their juices.
+ Show details− Hide details
Ready when: All apple slices are evenly coated with the sugar-spice mixture and the filling is fragrant
Tip: Don't over-toss or break the apples—they should stay in substantial pieces so the filling has good texture, not become applesauce.
Assemble the pie
- Remove the pie dough from the freezer if needed.
- Let it sit at room temperature for about 5 minutes until it's pliable but still very cold—you want it soft enough to shape easily but cold enough to stay flaky.
- Unroll or place the first crust into a 9-inch (23 cm) pie dish, allowing it to settle naturally into the corners and up the sides without stretching.
- Trim the overhang to about 1 inch all around.
- Pour the apple filling and all its accumulated juices into the crust, mounding the apples slightly higher in the center (they'll settle as they bake).
- Place the second crust over the filling.
- Trim the excess dough so that about 1 inch hangs over the rim on all sides.
- Fold both edges under (the bottom and top crust edges together) to create a thick rim, then crimp the edge decoratively with a fork or pinch with your fingers to seal.
- Using a small sharp knife, cut 4–5 small slits about 1 inch long in the top crust in any pattern you like (radiating from center, or scattered)—these vents allow steam to escape during baking.
+ Show details− Hide details
Ready when: Pie is fully assembled with sealed crimped edges and decorative vents cut in the top
Tip: Keep your dough cold throughout assembly—if it becomes soft and sticky, place the pie dish in the freezer for 10 minutes before continuing.
Chill and preheatOven 400°F / 205°C
- Carefully place the assembled pie on an oven shelf in the refrigerator and close the door.
- Set your oven to 400°F (200°C) and allow it to preheat.
- The pie should chill for at least 15–30 minutes while the oven heats (longer is even better—you can chill it overnight if you prepare it ahead).
- Chilling relaxes the gluten in the dough and keeps it from shrinking too much during baking, giving you a flakier, crisper crust.
- The cold pie also ensures the filling releases its juices gradually during baking rather than all at once.
+ Show details− Hide details
Ready when: Oven beeps to indicate it has reached 400°F (200°C) and pie is thoroughly chilled
Tip: This resting step is absolutely crucial—don't skip it or your crust may shrink, lose its flakiness, and become tough.
Make egg wash
- In a small bowl, crack the large egg and add 1 tablespoon (15 ml) of cold water.
- Using a fork, whisk vigorously for about 30 seconds until the egg is pale yellow and the water is fully incorporated.
- The mixture should look slightly foamy.
- This thin egg wash will give the baked pie crust a beautiful sheen and deep golden-brown color.
+ Show details− Hide details
Ready when: Egg and water are fully combined and pale
Brush crust with egg wash
- Remove the pie from the refrigerator and place it on the kitchen counter.
- Using a pastry brush or clean fingertip, brush the egg wash evenly over the entire top crust, covering all exposed surfaces.
- Try to avoid brushing the filling that may have oozed up through the vents, as that can make a sticky mess.
- Work quickly so the crust stays cold—the entire pie should spend no more than 2–3 minutes out of the fridge before going into the oven.
+ Show details− Hide details
Ready when: Top crust is evenly and lightly coated with glossy egg wash
Tip: Apply just one thin coat of egg wash—a second coat makes it thick and uneven, and can prevent browning.
Bake until goldenOven 400°F / 205°C
- Place a baking sheet on the lower oven rack (to catch any filling that bubbles over and drips).
- Carefully place the pie on the baking sheet and slide it onto the center rack of the preheated 400°F (200°C) oven.
- Set a timer for 30 minutes.
- At the 30-minute mark, open the oven and check the pie.
- The edges should be starting to brown.
- If the crust edges are browning too darkly (darker than golden), loosely tent the top with aluminum foil to protect them from further browning while the filling continues to cook.
- Close the oven and bake for another 20–25 minutes.
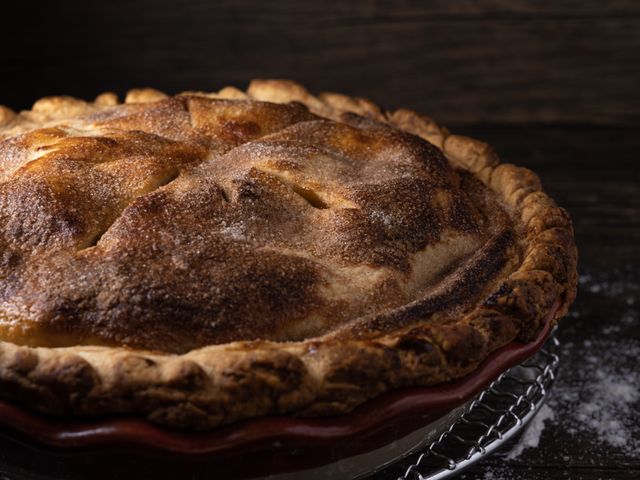
- The pie is fully baked when the crust is deep golden brown (almost amber-colored on the edges) and you can see thick, glossy bubbles of filling oozing out through the vents—the filling should no longer look watery or runny when you peek through the slits.
- This usually takes 50–55 minutes total.
+ Show details− Hide details
Ready when: Crust is deep golden brown and thick bubbles of filling are visible and no longer runny at the vents
Tip: Don't underbake—a pale crust often signals underbaked filling. If the crust looks pale and the filling doesn't bubble, bake for 5 more minutes and check again.
Cool on wire rack
- Carefully remove the pie from the oven using oven mitts (it will be extremely hot).
- Place the pie dish directly onto a wire cooling rack set on your counter, or on a trivet if you don't have a rack.
- Allow the pie to cool at room temperature for a minimum of 2–3 hours before slicing.
- This cooling time is essential because the filling must set as it cools—if you slice too early, the filling will still be molten and runny and will ooze out of the crust, leaving you with a sad plate.
- You can tell the pie is fully cooled by gently tapping the filling through the bottom of the dish—it should feel firm, not jiggly.
- Once cooled, you can serve it at room temperature, or gently reheat it.
- Alternatively, if you cannot wait, warm individual slices in a low oven and serve with vanilla ice cream, which is honestly delicious even if the filling is still warm.
+ Show details− Hide details
Ready when: Pie is cool to the touch and filling is completely set (doesn't jiggle when the pie is gently moved)
Tip: This is the hardest step—truly, resist the urge to slice early. The wait is worth it for perfect slices and a beautiful presentation.
Good to know
Tips
- The key to outstanding pie is flavor balance: tart apples provide structure and cut richness, while sweet apples add depth and body. Using only one variety—all tart or all sweet—produces a flat-tasting, one-dimensional filling.
- Chinese five-spice is aromatic and warming but not spicy—it contains no chili pepper. If you're sensitive to warming spices like cinnamon or clove, start with 1 teaspoon of the blend and taste the raw filling, adding more only if you like.
- A hot oven (400°F) combined with an egg wash and proper chilling creates a beautiful, crispy, golden crust. Don't fear deep color or even amber-brown edges—that signals the crust is fully baked and will be crispy, not pale and tough.
- This pie is best served at room temperature or slightly warm. The flavors are more pronounced and the spices more fragrant when not piping hot. If you cannot wait for the full cooling time, serve warm slices with vanilla ice cream—the melting ice cream is a delicious counterpoint to warm, spiced apples.
Make ahead
The pie dough can be made up to 2 days ahead and refrigerated, or frozen for up to 3 months. The fully assembled pie (unbaked) can be prepared up to 24 hours ahead—cover it loosely with plastic wrap and refrigerate. Bake directly from cold, adding 3–5 minutes to the total baking time. The fully baked pie keeps at room temperature, loosely covered, for up to 2 days before it begins to dry out.
Storage & reheating
Store leftover pie covered loosely with plastic wrap or foil at room temperature for up to 2 days. Refrigerate for up to 4 days (cover tightly to prevent it from absorbing refrigerator odors). To reheat, place uncovered slices or the whole pie in a 300°F (150°C) oven for 10–15 minutes to restore crispness to the crust; serve warm. You can also freeze the baked pie (whole or sliced, well wrapped in plastic wrap and foil) for up to 2 months. Thaw overnight in the refrigerator, then reheat as directed above.
Substitutions
- pie dough or store-bought pie crust → Any reliable pie crust recipe (all-butter, all-shortening, or a mix), or use store-bought frozen pie dough. Homemade all-butter crusts are flakier and more flavorful, but store-bought frozen dough is convenient and produces excellent results.
- Chinese five-spice powder → 1 teaspoon ground cinnamon + 1/4 teaspoon ground clove + 1/4 teaspoon ground allspice + 1/8 teaspoon white pepper (or ground Sichuan pepper if available). Blend these spices together to make your own five-spice powder—the result is nearly identical to the commercial blend.
- Granny Smith apples → Any combination of tart and sweet firm apples: Granny Smith + Fuji, Pink Lady + Braeburn, Honeycrisp + Cortland, or even all Granny Smith if you prefer pronounced tartness. Avoid very soft or mealy apples like Medjool or aged Red Delicious, which turn to mush during baking. Firmness is key to good texture.
- vanilla extract, pure → 1 teaspoon of brandy, bourbon, dark rum, or Cognac instead of vanilla. Alcohol adds subtle warmth and complexity that pairs beautifully with the five-spice powder, though it will cook off in the oven.
More pies & tarts
See all →

Find more like this
- Meal
- Dessert
- Cuisine
- Chinese
- Main ingredient
- Apples
- Diet
- VegetarianHalal
- Method
- Oven
- Quick & Easy
- Make Ahead