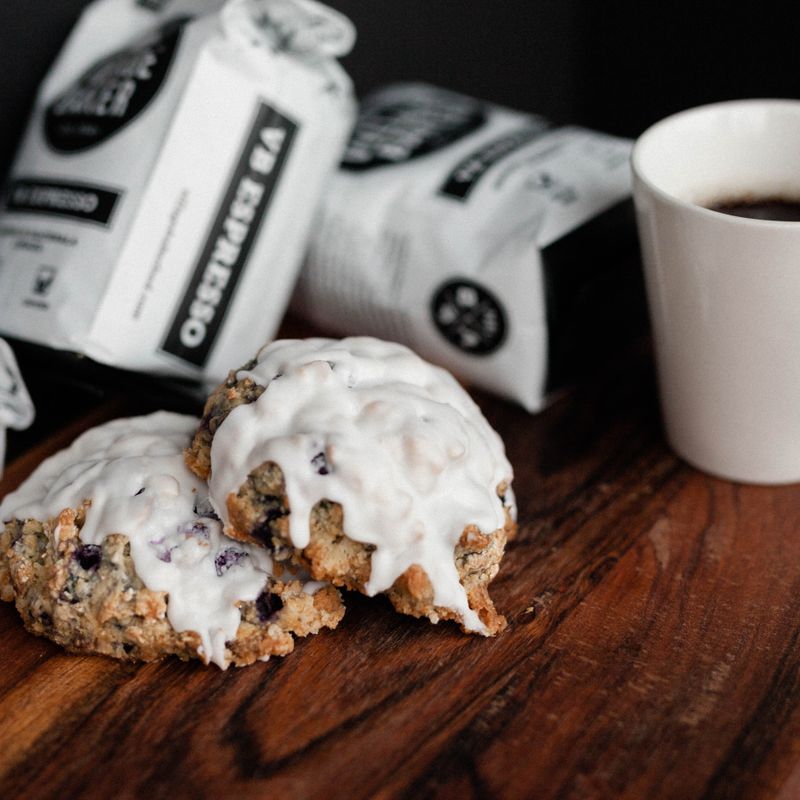
Bakery-Style Blueberry Scones
Tall, tender scones with a crisp sugared top, a buttery flaky crumb, bright lemon zest and bursts of juicy blueberry. Frozen berries and a short chill keep the dough cold, so the scones rise high and the berries stay whole.
- Prep
- 30 min
- Cook
- 22 min
- Wait
- 45 min
- Total
- 1 hr 37 min
- Makes
- 8 large scones
Steps
Before you start
- Freeze the butter for 15 minutes and keep the heavy cream in the fridge until the moment you use it. Cold fat is what makes scones flaky.
- Use blueberries straight from the freezer. If you only have fresh berries, freeze them on a plate for 30 minutes first.
- Plan about 1 hour 40 minutes in total: 30 minutes of hands-on work, a 30-minute chill, 22 minutes of baking and 15 minutes of cooling.
- Position an oven rack in the center. Do not preheat the oven until the dough is chilling (step 9).
Chill and line pan
- Line a large rimmed baking sheet with parchment paper.
- Cut the butter into ½-inch (1.25 cm) cubes, spread them on a small plate and put them in the freezer for 15 minutes.
- Keep the blueberries in the freezer and the cream and egg in the fridge until needed.
+ Show details− Hide details
Ready when: Butter cubes feel hard and very cold.
Tip: Freezing the butter lets you work it into the flour without it melting from your fingers.
Zest into sugar
- In a large mixing bowl, combine the granulated sugar and lemon zest.
- Rub them together with your fingertips for about 30 seconds.
+ Show details− Hide details
Ready when: The sugar looks damp and pale yellow and smells strongly of lemon.
Tip: Rubbing the zest into the sugar releases its oils, so the lemon flavor spreads through the whole dough.
Whisk dry ingredients
- Add the flour, baking powder and salt to the sugar.
- Whisk for 20 to 30 seconds so the baking powder is evenly distributed.
+ Show details− Hide details
Ready when: No streaks or clumps of baking powder remain.
Cut in butter
- Add the frozen butter cubes and toss to coat in flour.
- Pinch and press each cube flat between your thumb and fingertips, working quickly, until the mixture has a range of sizes: mostly coarse crumbs, with some flat pieces the size of large peas and a few almond-sized pieces.
- Alternatively, grate the frozen butter on the large holes of a box grater straight into the flour and toss gently.
+ Show details− Hide details
Ready when: Butter pieces are flat and pea-sized, and the flour looks like coarse, uneven crumbs. The mixture should still feel cool.
Tip: If the butter feels soft or greasy at any point, put the bowl in the freezer for 10 minutes.
Mix wet ingredients
- In a measuring jug or small bowl, whisk the ⅔ cup (160 ml) cold cream with the egg and vanilla until fully blended and no streaks of egg remain.
+ Show details− Hide details
Ready when: The liquid is a uniform pale cream color.
Form shaggy dough
- Make a well in the center of the flour mixture and pour in the wet mixture.
- Using a fork, then your hands, stir and fold just until the dough comes together in a shaggy mass with a few dry patches.
- Do not knead or beat it.
+ Show details− Hide details
Ready when: Most of the flour is moistened and the dough holds together when pressed, though it looks rough.
Tip: Overmixing develops gluten and gives tough, flat scones.
Fold in blueberries
- Tip the dough onto a lightly floured counter.
- Scatter the frozen blueberries over the top.
- Gently press and fold the dough over the berries 3 to 4 times, just until they are distributed.
- A few berries may break, which is fine.
+ Show details− Hide details
Ready when: Berries are spread throughout and no large dry flour patches remain.
Tip: Keep the berries frozen. Thawed berries bleed and turn the dough gray-purple.
Shape and cut
- Pat the dough into a round about 8 inches (20 cm) across and 1¼ inches (3 cm) thick, dusting with flour only as needed.
- Using a sharp knife or bench scraper, cut the round into 8 equal wedges, pressing straight down rather than sawing.
- Transfer the wedges to the prepared baking sheet, spacing them about 2 inches (5 cm) apart.
+ Show details− Hide details
Ready when: The wedges are even in size with clean, straight sides.
Tip: Press the blade straight down. Dragging it seals the edges and limits the rise.
Chill the sconesOven 400°F / 205°C
- Refrigerate the baking sheet, uncovered, for 30 minutes.
- About 15 minutes into the chill, place a rack in the center of the oven and preheat to 400°F (200°C).
+ Show details− Hide details
Ready when: The wedges feel firm and cold to the touch.
Tip: Don't skip the chill. It helps the scones keep their shape instead of spreading.
Brush and bakeOven 400°F / 205°C
- Brush the tops of the chilled scones with the 1 tablespoon cream, avoiding the cut sides, and sprinkle generously with the turbinado sugar.
- Bake at 400°F (200°C) for 20 to 24 minutes, rotating the pan front to back after 12 minutes.
+ Show details− Hide details
Ready when: Tops and bottoms are deep golden brown, the sides look set rather than doughy, and any berry juice that leaks out looks sticky and caramelized.
Tip: Cream that drips down the sides can glue the layers together and stop them rising, so brush only the tops.
Cool before serving
- Let the scones sit on the baking sheet for 5 minutes, then move them to a wire rack.
- Cool for at least 10 more minutes before serving.
- They are best warm or at room temperature on the day they are baked.
+ Show details− Hide details
Ready when: The scones feel firm when lifted and the berry filling is no longer molten.
Tip: The berries stay very hot inside, so let the scones rest before biting in.
Good to know
Tips
- Measure the flour by weight if you can. Scooping straight from the bag can add up to 30 percent more flour and give dry scones.
- The dough should look shaggy and slightly sticky. If it is too wet to handle, dust with a tablespoon of flour at a time, but avoid adding more than 2 tablespoons.
- For taller scones, use a baking powder that is fresh and press the cutter or knife straight down without twisting.
- Bake on a light-colored baking sheet if possible. Dark pans can over-brown the bottoms before the centers are cooked.
Make ahead
Shape and cut the scones, then freeze them on the baking sheet until solid (about 1 hour). Transfer to a freezer bag for up to 2 months. Bake straight from frozen at 400°F (200°C), brushing with cream and sugar first, and add 4 to 6 minutes to the baking time. Alternatively, cover the cut, unbaked scones and refrigerate for up to 12 hours before baking.
Storage & reheating
Room temperature: store in an airtight container for up to 2 days (best on day 1). Fridge: up to 4 days in an airtight container. Freezer: wrap individually and freeze baked scones for up to 2 months. To reheat, warm at 325°F (160°C) for 8 to 10 minutes (12 to 15 minutes from frozen) until warm and the edges crisp.
Substitutions
- heavy cream → cold whole milk or buttermilk. Whole milk gives a slightly less rich scone. Buttermilk gives a tangier, tender crumb. Use the same volume. The dough may need a little extra flour if it feels sticky.
- blueberries → frozen raspberries, chopped frozen strawberries or dried cranberries. Use the same weight. Raspberries break up more easily, so fold them in very gently.
- lemon zest → orange zest. Use the same amount for a sweeter, softer citrus flavor.
- turbinado or coarse sugar → granulated sugar. Gives a finer, less crunchy sugar crust.